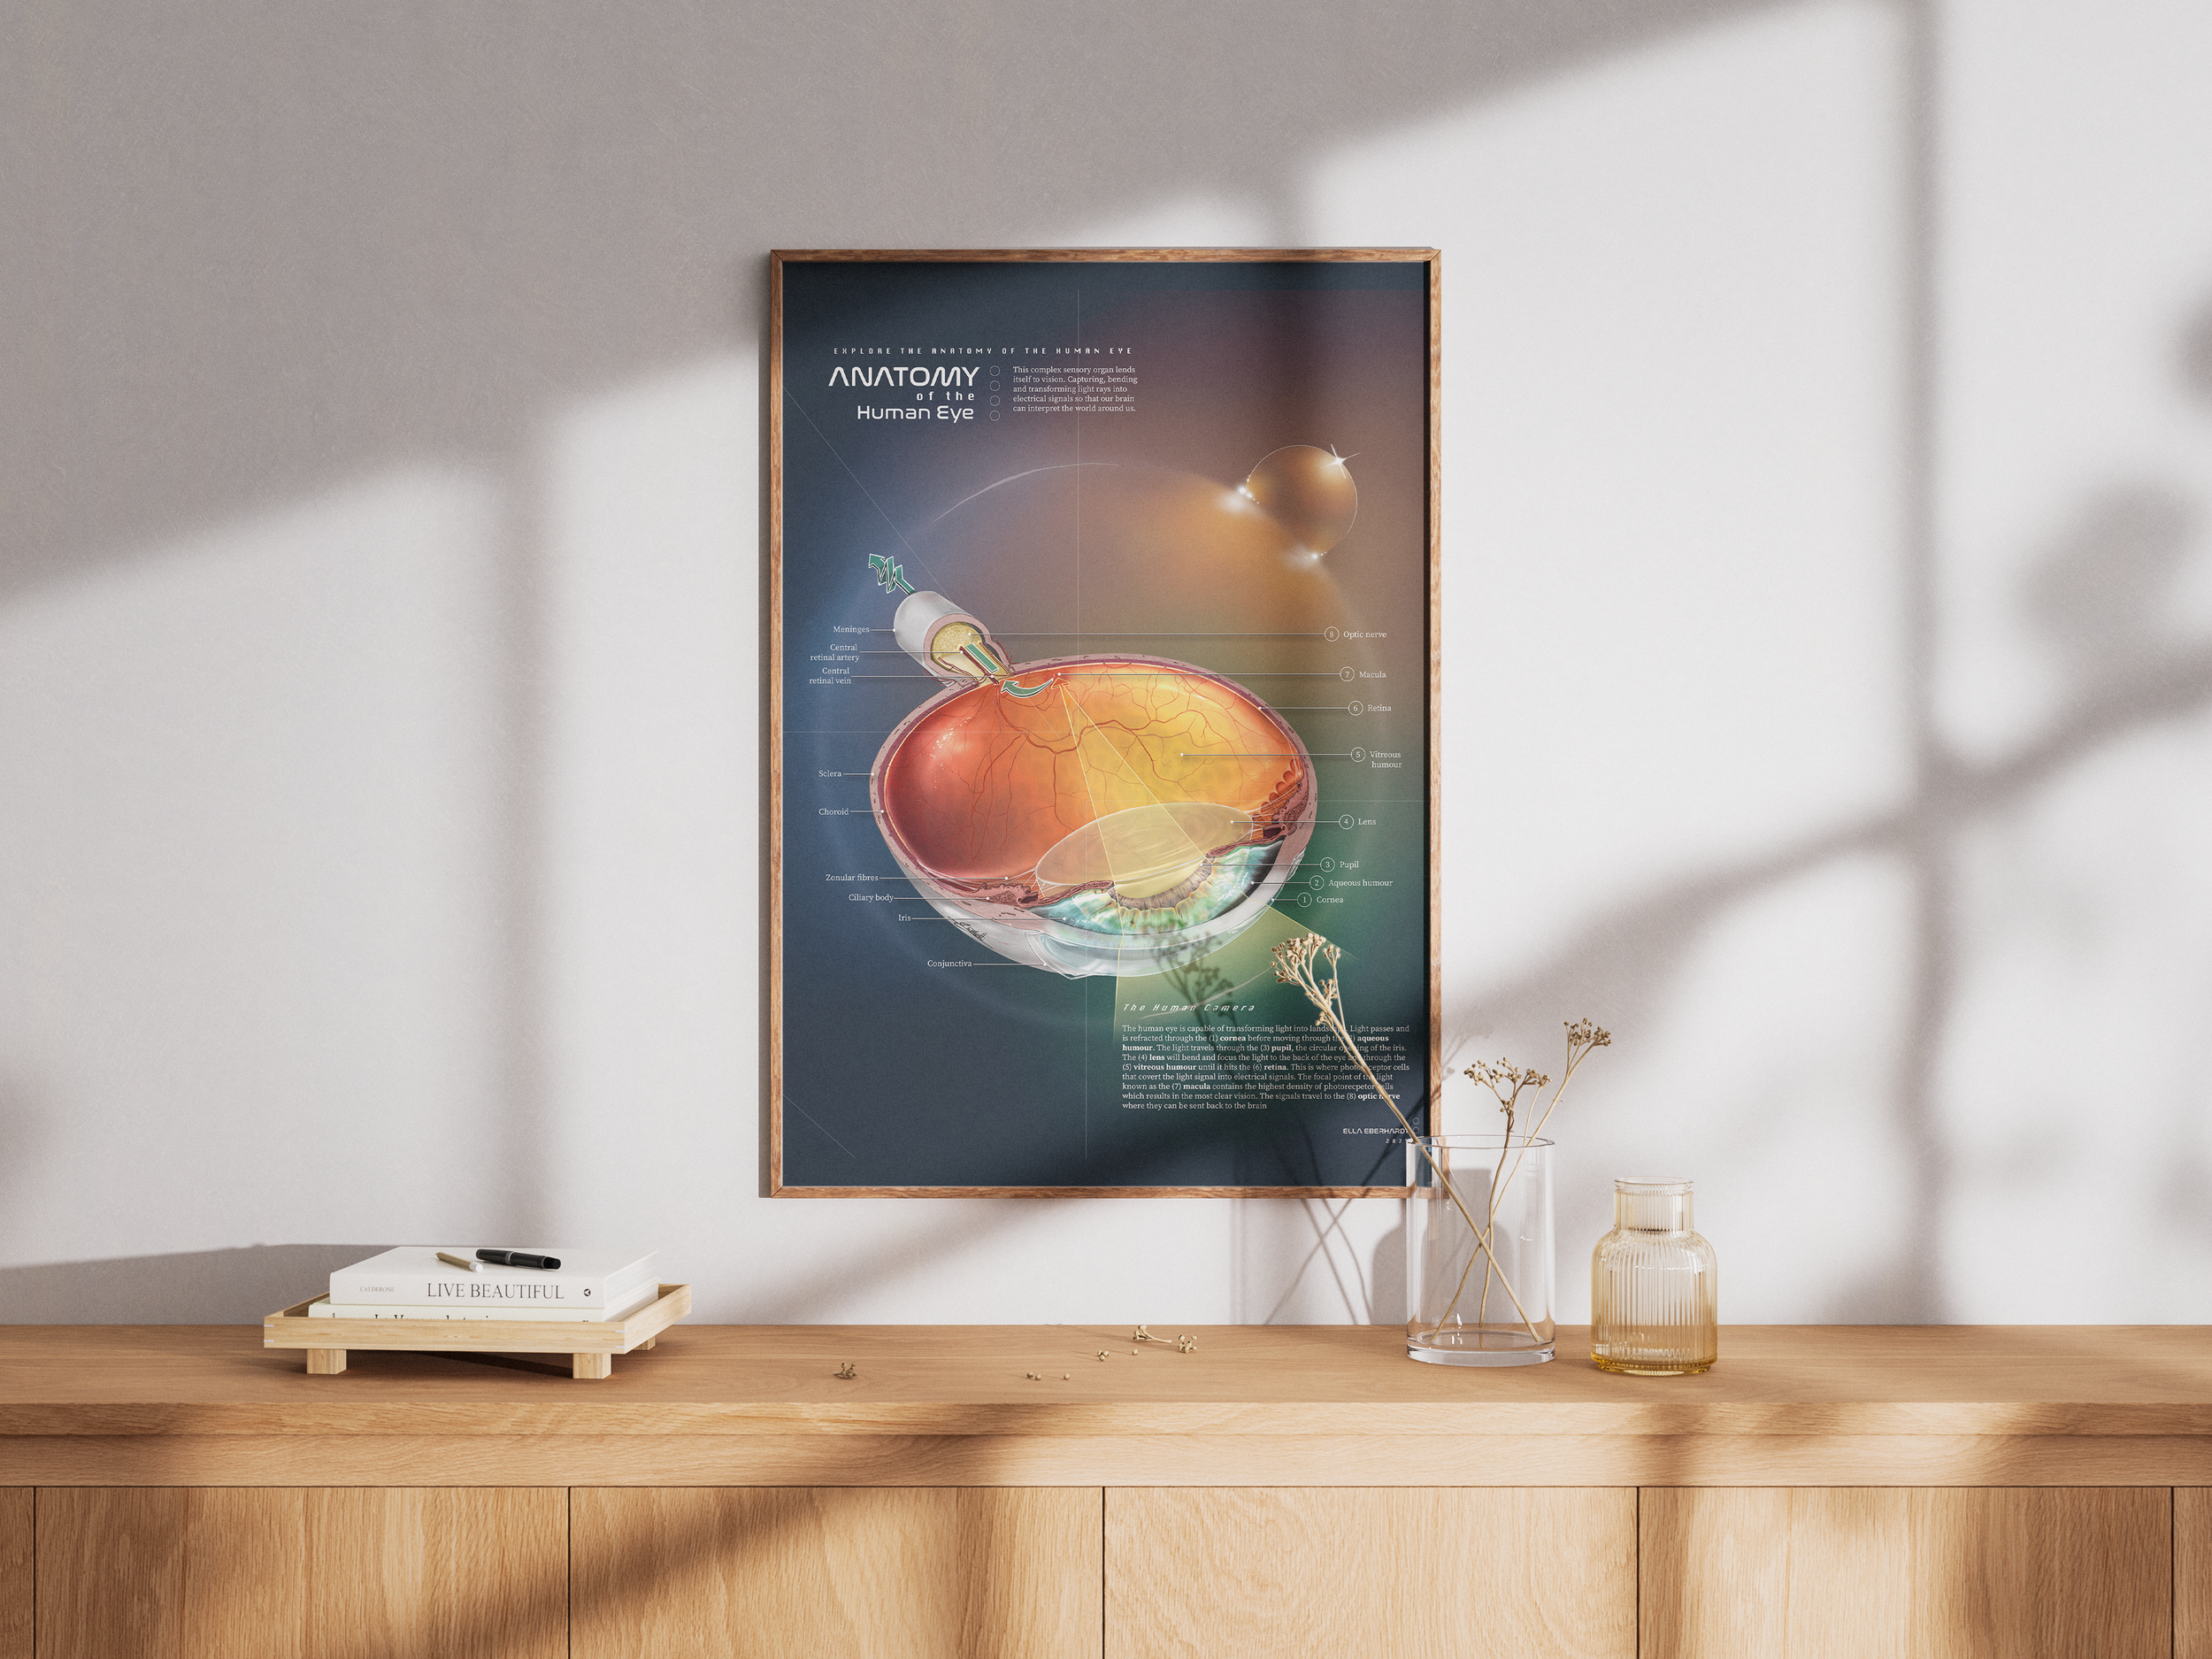
The Human Camera
Learn a little about human eye anatomy while at the ophthalmologist or optometrists office. This anatomical illustration was created to highlight the anatomy and pathway that light travels through the human eye to allow a general patient audience to grasp a better understanding. The aim was to create an aesthetic poster that could be put up at the optometrists or ophthalmologist office that would draw a patient in to read more about their eyes. The design decisions such as the astronomy themed background and font were chosen to draw the audience in. The poster was created to be printed at 18” x 24” with 13pt font in order to be minimal yet accessible. In order to create this piece, extensive research into the size of all layers and their material composition. Several 3D maquettes were built in order to ensure the foreshortening distortion of the anatomical features were accurate.
Clients
Michael Corrin (Professor, University of Toronto)
Date
January 2025
Role
Research, Content Development, Visual Development, Layout
Format
Large format printed poster
Audience
Educated lay audience and opthalmolgy students
Tools
Adobe Illustrator, Cinema4D & Procreate
Research
Extensive research into understanding the human eye as we delved into the dimensions of all the layers of the human eye, the different materials and how they behave and how the various layout refract light.
Light passes through the cornea, the aqueous humor, the lens (focusing the light) and thought the vitreous humor onto the retina at the fovea which converts the light into an electrochemical impulse that travels along the optic nerve. (Michigan Medicine, 2023).
We also took our own reference pictures by imaging our own eyeballs as well as conducting pig eye dissections done in Athena's kitchen (Pig heads from local butcher).
See end of page for images (CONTENT WARNING: Dissection)
Concept Sketch
The first sketches were done in Procreate following an anterolateral view with a transverse cut inside of a face. I was originally thinking of having the eye in full colour with a grayscale face in the background giving context to the organ; however, this idea was tabled due to the scale of the project.
I then moved on to create a sagittal cut of the eye in order to break down measurements and crunch the numbers alongside the other 2T6s doing the eye (Athena & Grace). After these sketches, we felt comfortable moving onto the maquette building.
Maquette
We built three maquettes total, the first in ZBrush and the last to as lathe objects in Cinema 4D using Illustrator vectors. Using the measurements found during research, Grace began by drawing out the eye on paper and using a ruler to measure everything at a larger scale. I then brought that into Adobe Illustrator and remade the object and used the Adobe measurement tool to ensure everything was as calculated. Athena then brought it into Cinema 4D and made lathe objects of all the vector lines to create the maquette. Separately, we took that maquette and Booleaned it to suit or views.
Final Sketch
With the final perspective and layout decided, a final sketch was created alongside a rough colourway to direct rendering.
Illustrator
The signed off sketch was traced in Illustrator in order to get clean and crisp outline for all of the major structures that could then be imported to procreate to work on.
White Clay
The final maquette was modified in Cinema 4D with materials made to emulate white clay in order to get references for top left light shining onto this material. Rendering will be done in grayscale and treating everything like white clay in order to colourized later. We are solving the luminance values first before applying chroma.
Rendering
Step 1. Layout major light and dark (Note: solve the curved depth and remove highlights)
Step 2. Defining major textures and refining shapes.
Step 3. Expanding details and refining texture such as retinal vasculature.
Step 4. Refining further specifically messing with the opacity of various elements.
Step 5. Colourization time!
Step 6. Add arrow and light to lightbulb
Final
The final piece was laid out in an infographic style that could be presented as a poster in a clinic or optometrist office. The layout was created in Adobe Illustrator.
AMI Salon 2025
This piece was submitted as student still media as a didactic anatomical piece in the 2025 Association of Medical Illustrators (AMI) Salon.
Pig Eye Dissection
Find the pig eye dissection images below.
IMIRS Volume 5
Check out the article that I wrote outline the process for creating medical illustration that was published in the IMIRS’ 5th volume using this piece as an example.